
How To Compress PDF On Mac With Preview
If a PDF file has not been created with the correct compression techniques it can lead to large and impractical file sizes. I first came across this problem when I used my Epson WF3520 printer to scan several pages in to a PDF file. The resultant file was a massive 80MB which was impractical. Instead of using third-party software on the web or Mac app store I prefer using OS X's capabilities to carry out tasks rather than clog my machine with applications that have limited use and support. This tutorial uses the built in Preview application on most modern Mac computers to compress and reduce the size of PDF files. Before you get started, you'll need to download the following file:
How to compress a PDF file with Preview on Max OSX
This tutorial has been tested on OS X 10.9 Mavericks and 10.10 Yosemite, however it should also works on most other modern versions of OS X that have Preview.
Step 1: Download the file linked above (Reduce to 150dpi filter) and copy it in to the following folder. You will need to unzip it first.
Macintosh HD > Library > PDF Services
Step 2: Locate your PDF file. Double click to open it in Preview. If PDFs have not been set to automatically open in Preview, you'll need to Right Click and select Open With and then Preview. 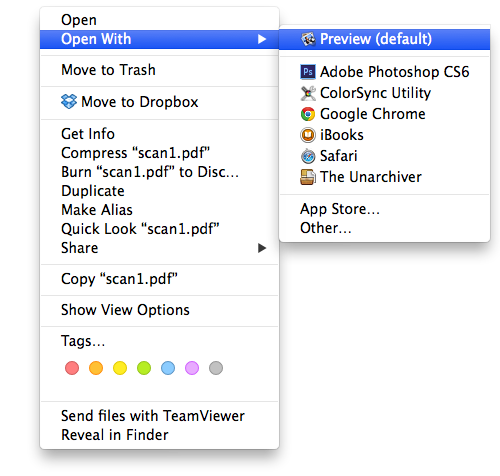 Step 3: With the file now open in Preview, click File and then Export.
 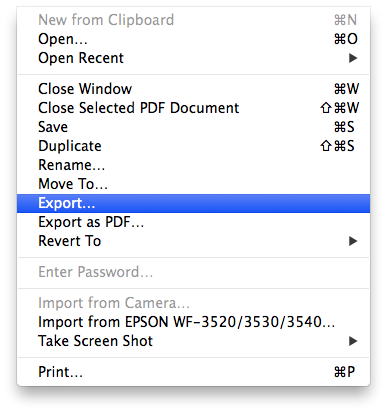 Step 4: In the new window that appears, give your file a name and location, select PDF Format and then under Quartz Filter select Reduce to 150dpi. Click Save and your newly compressed PDF file will be placed in the location you selected.
 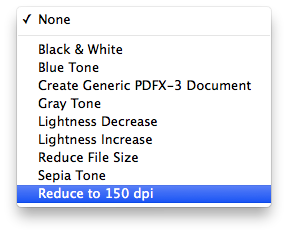 In our tests, we managed to reduce an 80MB file to 600KB. Download Links

Thanks for reading!
My name is Zahid Mahmood, and I'm one of the founders of Anterior. I started this technology blog when I was in high school and grew it to over 100,000 readers before becoming occupied with other projects. I've recently started writing again and will be posting more frequently.